Plastic SCM working with JIRA Part I
Read the new version: "Parallel development with Plastic SCM and Jira".On the series of posts about Plastic SCM extension I am going to explain how to use Plastic SCM and JIRA for the benefit of users of this task tracking system. Plastic SCM for Atlassian JIRA provides reliable data mapping features that allow data type transformation between both tools.
Jira extension allows you to log every check-in you do, associating them to a task. This feature improves the traceability in your software life cycle. To exploit this feature we have to perform several easy steps.
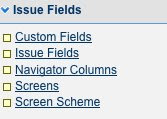
First of all, to enable this feature we have to setup a parameter on the Jira server, so you will need an Administrator account to create a new custom field. You can find this option on the "Administration" tab, then click on "Custom Fields".
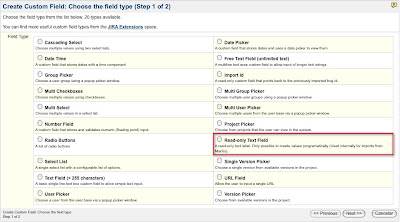
Then, you will see a new dialog. All you have to do to create a new custom field is to click on the "Add CustomField" button, and choose the ReadOnly text Field option

Now, you have to set a name to the new field. You can leave the options by default, which means that this check in log will be used for every project and every type of issue. Although these options can be modified later.

In the following step you have to associate the Plastic SCM field to a screen, this screen will be the default one.

The custom field will not appear until a check in operation is done by a client on a plastic branch binded to a Jira task
You can see that an internal id has been assigned to this CustomField
This number will be used later to setup a parameter on the Plastic Client.

 Finally, go to "General Configuration" in Global Settings and check whether the ‘Accept remote API calls’ is active.
If not, click on "Edit Configuration" and enable it.


Ok, that was all on the server side.
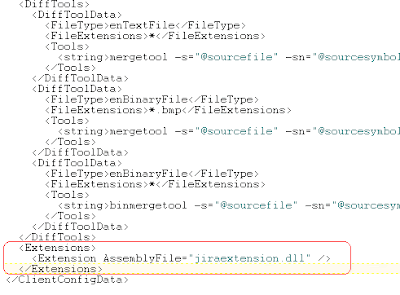
Now, in order to start working with Plastic,you have to copied the "jiraextension.dll" file on the Plastic SCM client folder, adding the following lines (circled in red, which will indicate that Jira is the extension used), on the client.conf file:
The next step to ensure that the extension is properly set up is creating a "jiraextension.conf" file; on this file we indicate the extension parameters. Here we have to options, the first one is the "Task on branch" option which is used to link one task in Jira with a branch in Plastic, in order to use this option the "jiraextension.conf" file must have the following appearance:
<JiraExtensionConfiguration>
<HttpUrl>http://192.168.1.14:8080</HttpUrl>
<User>root</User>
<Password>root</Password>
<ProjectKey>PRJ</ProjectKey>
<BranchPrefix>SCM</BranchPrefix>
<WorkingMode>TaskOnBranch</WorkingMode>
<CustomFieldId>customfield_10000</CustomFieldId>
</JiraExtensionConfiguration>
And now we are all set to start working!
The person in charge of creating new tasks and assigning them has created a new Jira issue on the task tracking tool, which has been give number 3 on the project we are working on, as you can see on the following figure:
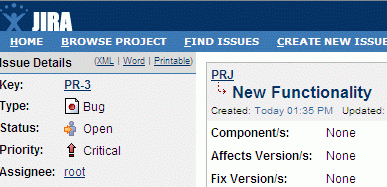
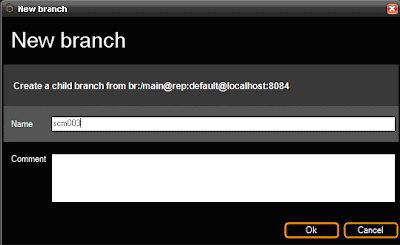
Once the task has been assigned (in this case to root as shown on the previous image), the developer will start working on it: he goes to Plastic and creates a new branch, giving it the same name as the Jira issue with the prefix stated on the "jiraextension.conf" file, in this case SCM:
Now to see how the extension works, if we go to the branch view and click on the "Show extended information option" on the top and select the newly created branch we can see on a menu on the right the information of the issue linked to that branch displayed as shown on the following image:
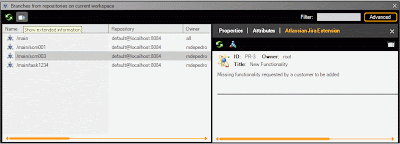
The extension information shows the name of the Jira issue as well as its owner, title, comment and status. By clicking on it, an Explorer window with the associated branch issue is opened, whenever the user wants to change the status of the issue, he will only have to refresh it on the Plastic branch extended information and the new information will appear.
On the next post I will explain how to use the "task on changeset" working mode working with Plastic SCM and Jira!


0 comentarios: